


How to Choose the Right Hand Crimper in 2026?
Choosing the right Hand Crimper in 2026 requires more than comparing prices or counting product reviews. The correct tool must match the terminal type, wire size, connector material, and intended working environment. A crimper designed for insulated terminals may perform poorly on open-barrel contacts. That mismatch can create loose connections, damaged conductors, or unnecessary rework. Small details matter.
Practical workshop testing shows that jaw alignment, ratchet release, handle comfort, and die markings deserve close attention. A reliable Hand Crimper should apply even pressure without cutting strands or deforming the terminal excessively. Look for clear gauge ranges, replaceable dies, corrosion-resistant materials, and quality-control information from the manufacturer. Compatibility with recognized technical standards also improves confidence, although certification claims should be checked carefully rather than accepted at face value. Marketing language can be vague.
The best choice depends on real use. A technician making occasional repairs may prefer a compact manual model. An installer completing hundreds of crimps may need stronger leverage, repeatable compression, and reduced hand fatigue. Battery-powered options can increase productivity, but their weight, charging needs, and maintenance require honest evaluation. Ergonomics are often overlooked until the fifth hour of work.
There is no perfect tool. Even an expensive crimper can fail when used with the wrong die or terminal. This guide examines the practical factors behind a dependable purchase, including performance, safety, durability, and long-term value. It also questions common assumptions, because a polished tool is not automatically the right one.
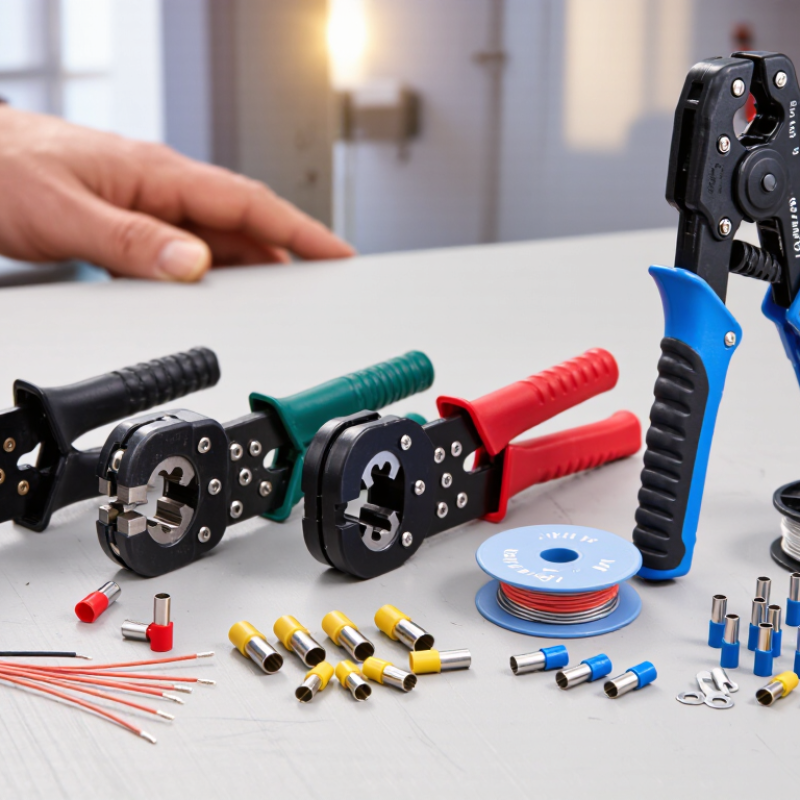
What Is a Hand Crimper and How Does It Work?
A hand crimper is a compact mechanical tool that joins a wire to a terminal by controlled pressure. It does not solder the connection. When you squeeze the handles, the jaws close around a matched die and reshape the terminal barrel. That pressure grips the conductor and creates a stable electrical path. Some models use a ratcheting mechanism. It keeps the jaws closed until the handle cycle finishes. That feature reduces half-crimped connections.
In practical work, the die must match both the terminal type and wire size. An oversized cavity may leave the wire loose, while excessive pressure can damage strands. Good crimping starts with a clean, correctly stripped conductor. Insert the wire fully, center the terminal, and close the handles smoothly. Afterward, inspect the barrel for even compression and exposed strands. A gentle pull test can reveal a weak grip. Professional practice also checks tool calibration and follows applicable electrical standards.
I once trusted a firm-looking crimp that later loosened during vibration. The mistake was subtle: the terminal and die were not truly compatible. Visual confidence is not enough. Repeatable pressure matters more than hand strength. For this reason, choosing a hand crimper involves more than comparing handle comfort. Look for clear size markings, solid jaw alignment, and a release mechanism that works reliably. A tool can feel excellent and still need periodic inspection. That small check is easy to skip.
How to Choose the Right Hand Crimper in 2026? - What Is a Hand Crimper and How Does It Work?
| Selection Dimension | What It Means | Typical Data or Options | How the Hand Crimper Works | Recommended Choice |
|---|---|---|---|---|
| Basic Definition | A hand crimper is a manually operated tool used to join a wire, cable, or terminal by controlled mechanical deformation. | Commonly used for insulated terminals, non-insulated terminals, wire ferrules, coaxial connectors, and modular plugs. | Closing the handles transfers force through a pivot and jaw assembly, compressing the connector around the conductor. | Choose a tool designed for the exact connector family being installed. |
| Terminal Compatibility | The crimper must match the terminal shape and crimp profile. | Common profiles include indent, oval, hexagonal, square, B-crimp, and modular plug crimping. | Matched dies form the terminal into a controlled profile that holds the conductor mechanically and electrically. | Use dedicated dies when the connector manufacturer specifies a particular profile. |
| Wire Cross-Section | The supported conductor range determines whether the tool can create a secure crimp without damaging the wire. | Typical manual tools cover approximately 0.14–6 mm², while heavy-duty models may cover larger conductors. | The die cavity limits how far the terminal can be compressed for a selected wire size. | Select a range that places the target wire size near the middle of the tool’s rated capacity. |
| American Wire Gauge | AWG is another common way to specify conductor size, especially in electronics and automotive work. | Typical hand-crimper ranges include about 10–26 AWG, depending on the tool and terminal type. | The correct die applies sufficient pressure to the terminal barrel without cutting or flattening the conductor excessively. | Do not convert between mm² and AWG by approximation when working to a safety-critical specification. |
| Crimping Force | Crimping force is the mechanical load required to form the connector correctly. | Light-duty tools may require roughly 80–150 N at the handles; ratcheting and heavy-duty tools require greater effort but provide higher output force. | The lever ratio between the handles and jaws multiplies hand force at the crimping point. | Choose a high-leverage or compound-action model for larger terminals or repeated work. |
| Operating Mechanism | The mechanism affects consistency, required effort, and ease of release. | Common mechanisms include standard pivot, compound-leverage, ratcheting, and self-adjusting designs. | A ratchet prevents the handles from opening until the crimp cycle reaches a defined position, reducing incomplete crimps. | A full-cycle ratchet is generally preferable for repeatable field or production work. |
| Insulated Terminals | These terminals have a plastic sleeve that helps provide electrical insulation and strain protection. | Typical color-coded ranges are red for smaller conductors, blue for medium conductors, and yellow for larger conductors; exact ranges vary by standard. | The die compresses the metal barrel while the insulated section is supported by a separate part of the jaw. | Use a color-coded insulated-terminal crimper rather than a general-purpose plier. |
| Non-Insulated Terminals | These terminals expose the metal barrel and are common in compact electrical assemblies. | Often used with ring, fork, butt, pin, and blade terminals across small and medium wire sizes. | The die forms the barrel directly around the conductor, often producing a controlled indent or oval shape. | Choose a non-insulated terminal die with the correct cavity geometry and size markings. |
| Wire Ferrules | Ferrules prevent stranded wire ends from spreading when inserted into a screw or spring terminal. | Common ferrule crimp profiles include square, hexagonal, and trapezoidal; typical ranges are about 0.25–16 mm² for manual tools. | The die compresses the ferrule sleeve around the strands, creating a compact termination. | Use a ferrule crimper with a profile compatible with the terminal block and ferrule standard. |
| Coaxial Connectors | Coaxial crimpers are designed for cable shields, ferrules, and connector bodies used in signal cables. | Typical cable families include small-diameter radio-frequency and video cables; supported diameters vary by die set. | The die compresses the connector ferrule around the cable shield while preserving the cable geometry. | Select the tool according to cable diameter and connector series, not only by appearance. |
| Modular Plugs | Modular crimpers attach telephone or data plugs to compatible multi-conductor cables. | Common plug formats include 6-position and 8-position modular connectors, with different contact counts and cable layouts. | The tool presses the plug contacts into the conductors and may also secure the cable strain-relief tab. | Confirm plug size, contact count, wiring arrangement, and cable type before crimping. |
| Die Configuration | Dies determine the shape and size of the finished crimp. | Fixed-die tools are faster to use; interchangeable-die tools provide broader connector coverage. | Removable dies can be changed to alter the compression profile without replacing the complete handle assembly. | Choose interchangeable dies when working with several connector families. |
| Handle Length | Longer handles usually provide more leverage but may be less convenient in confined spaces. | Many compact models are approximately 150–200 mm long; larger hand tools may be about 220–300 mm long. | Longer handles increase the moment around the pivot, reducing the hand force needed for the same jaw load. | Use compact handles for access and longer handles for high-force applications. |
| Ergonomics | Grip design, spring action, handle opening, and balance affect comfort and fatigue. | Useful features include nonslip grips, return springs, adjustable handle stops, and reduced handle spread. | Ergonomic features do not change the crimp profile, but they can improve control and reduce repetitive-strain risk. | For frequent use, prioritize comfortable grips and a handle span that fits the operator’s hand. |
| Material and Durability | The frame and dies must withstand repeated compression without excessive wear or deformation. | Common construction includes hardened steel dies, forged or stamped steel frames, and corrosion-resistant surface treatments. | Rigid jaws keep the die aligned so pressure is distributed consistently across the connector barrel. | Look for hardened, accurately aligned dies and a frame with minimal side-to-side movement. |
| Adjustment Capability | Adjustment allows the user to fine-tune crimp depth or compensate for material differences. | Some tools include a pressure-adjustment wheel or indexed setting; others use fixed factory calibration. | An adjustment changes the final jaw position or mechanical stop, altering the amount of terminal compression. | Use adjustable models only when the adjustment range can be verified with pull and visual tests. |
| Crimp Quality Check | A correct crimp must provide both mechanical retention and a reliable electrical connection. | Checks may include visual inspection, conductor-brush inspection, pull testing, and low-resistance measurement. | The crimp should hold the conductor without cutting strands, excessive deformation, cracks, or loose insulation support. | Always inspect the finished crimp and test samples when changing wire, terminal, or tool settings. |
| Application Environment | Indoor panels, automotive systems, telecommunications, and outdoor installations impose different requirements. | Consider vibration, moisture, temperature, available workspace, and the need for sealed connectors. | The hand tool creates the mechanical joint; environmental protection usually comes from the connector, seal, and installation method. | For vibration or moisture exposure, use terminals and seals rated for that environment. |
| Best General-Purpose Choice | A versatile tool should cover common terminal types without sacrificing crimp consistency. | A ratcheting crimper with clear size markings and interchangeable or multi-cavity dies is suitable for many maintenance tasks. | The ratchet controls the cycle while the selected die cavity controls the compression profile. | Choose versatility only when the tool’s die profiles match the connectors used in the project. |
| Important note: The numerical ranges in this table are typical industry ranges for hand-operated tools, not universal specifications. Always follow the terminal, connector, wire, and tooling requirements specified for the particular installation. | ||||